How to install Zabbix 4 on CentOS 7
You want to know how to install Zabbix in an Enterprise environment? Well there are plenty of how to’s, definitely don’t use this one.
So, I stumbled upon Zabbix the other day and I was thinking I make a blog post out of it. Yeah, you’re welcome ;P
You might ask what is Zabbix? According to their website:
Zabbix is a mature and effortless enterprise-class open source monitoring solution for network monitoring and application monitoring of millions of metrics.
Update your system
Get the latest updates for your CentOS server
[root@centos ~]# yum update
Add Zabbix repo
In order to install Zabbix you will need to add the Zabbix repository to your system, if your are using anything other than CentOS 7 navigate to the Zabbix repository generator to get guidance on how to install it on your desired system.
[root@centos ~]# rpm -i https://repo.zabbix.com/zabbix/4.0/rhel/7/x86_64/zabbix-release-4.0-1.el7.noarch.rpm
Install Zabbix
The following command will install Zabbix (Server, Web frontend & agent) including some of its dependencies (MariaDB, httpd, PHP ecc. - basically the LAMP stack)
If you want to install MariaDB on your own, check out this blog post for guidance on that.
[root@centos ~]# yum install zabbix-server-mysql zabbix-web-mysql zabbix-agent
Create MariaDB user, database & import schema
In order for Zabbix to work it needs a database so what we’re going to do next is set up a blank DB & then import the Zabbix schema/data.
If you want to do this using phpMyAdmin go for it, I might post a phpMyAdmin article on that soon.
I prefer the command line approach since that is way quicker (please set a strong password in the 3rd line).
The import might take a few minutes to be patient.
[root@centos ~]# # mysql -uroot -p
MariaDB> create database zabbix character set utf8 collate utf8_bin;
MariaDB> grant all privileges on zabbix.* to zabbix@localhost identified by 'yourdesiredpw';
MariaDB> quit;
[root@centos ~]# zcat /usr/share/doc/zabbix-server-mysql*/create.sql.gz | mysql -uzabbix -p zabbix
Modify Zabbix conf
Now we need to tell the Zabbix config file the password of the earlier created MariaDB user. All you need to do is uncomment & edit the DBPassword= parameter.
[root@centos ~]# vi /etc/zabbix/zabbix_server.conf
edit:
DBPassword=password
Modify Zabbix Apache conf or php.ini
Zabbix wants you to set the a zone, you can do this by either setting it in the Zabbix apache conf file or by editing the php.ini config file.
[root@centos ~]# vi /etc/httpd/conf.d/zabbix.conf
edit:
php_value date.timezone Europe/Rome
Open firewall ports
In order to be able to connect to the Web interface you’ll need to open up some ports.
I’m also opening the Zabbix server port 10051.
[root@centos ~]# firewall-cmd --permanent --zone=public --add-service=http
[root@centos ~]# firewall-cmd --permanent --zone=public --add-service=https
[root@centos ~]# firewall-cmd --permanent --zone=public --add-port=10051/tcp
[root@centos ~]# firewall-cmd --reload
SELinux
For the sake of simplicity I’ll set SELinux to permissive, if you want to know how to set it up with enforcing let me know in the comments, I might have a look at it.
[root@centos ~]# vi /etc/selinux/config
edit:
SELINUX=permissive
[root@centos ~]# reboot
Start & enable services
At this point everything should be set up, now you’ll want to launch & enable Zabbix. If you had apache installed on your system before, you want to restart it also
[root@centos ~]# systemctl start zabbix-server zabbix-agent httpd
[root@centos ~]# systemctl enable zabbix-server zabbix-agent httpd
[root@centos ~]# apachectl restart
[root@centos ~]# service zabbix-server status
Configure Zabbix via the web installer
You shoul’d be ready for the final part of the set-up, navigate to your Servers IP / Hostname / FQDN.
In my case it’s: http://zabbix.rabanser.local/zabbix
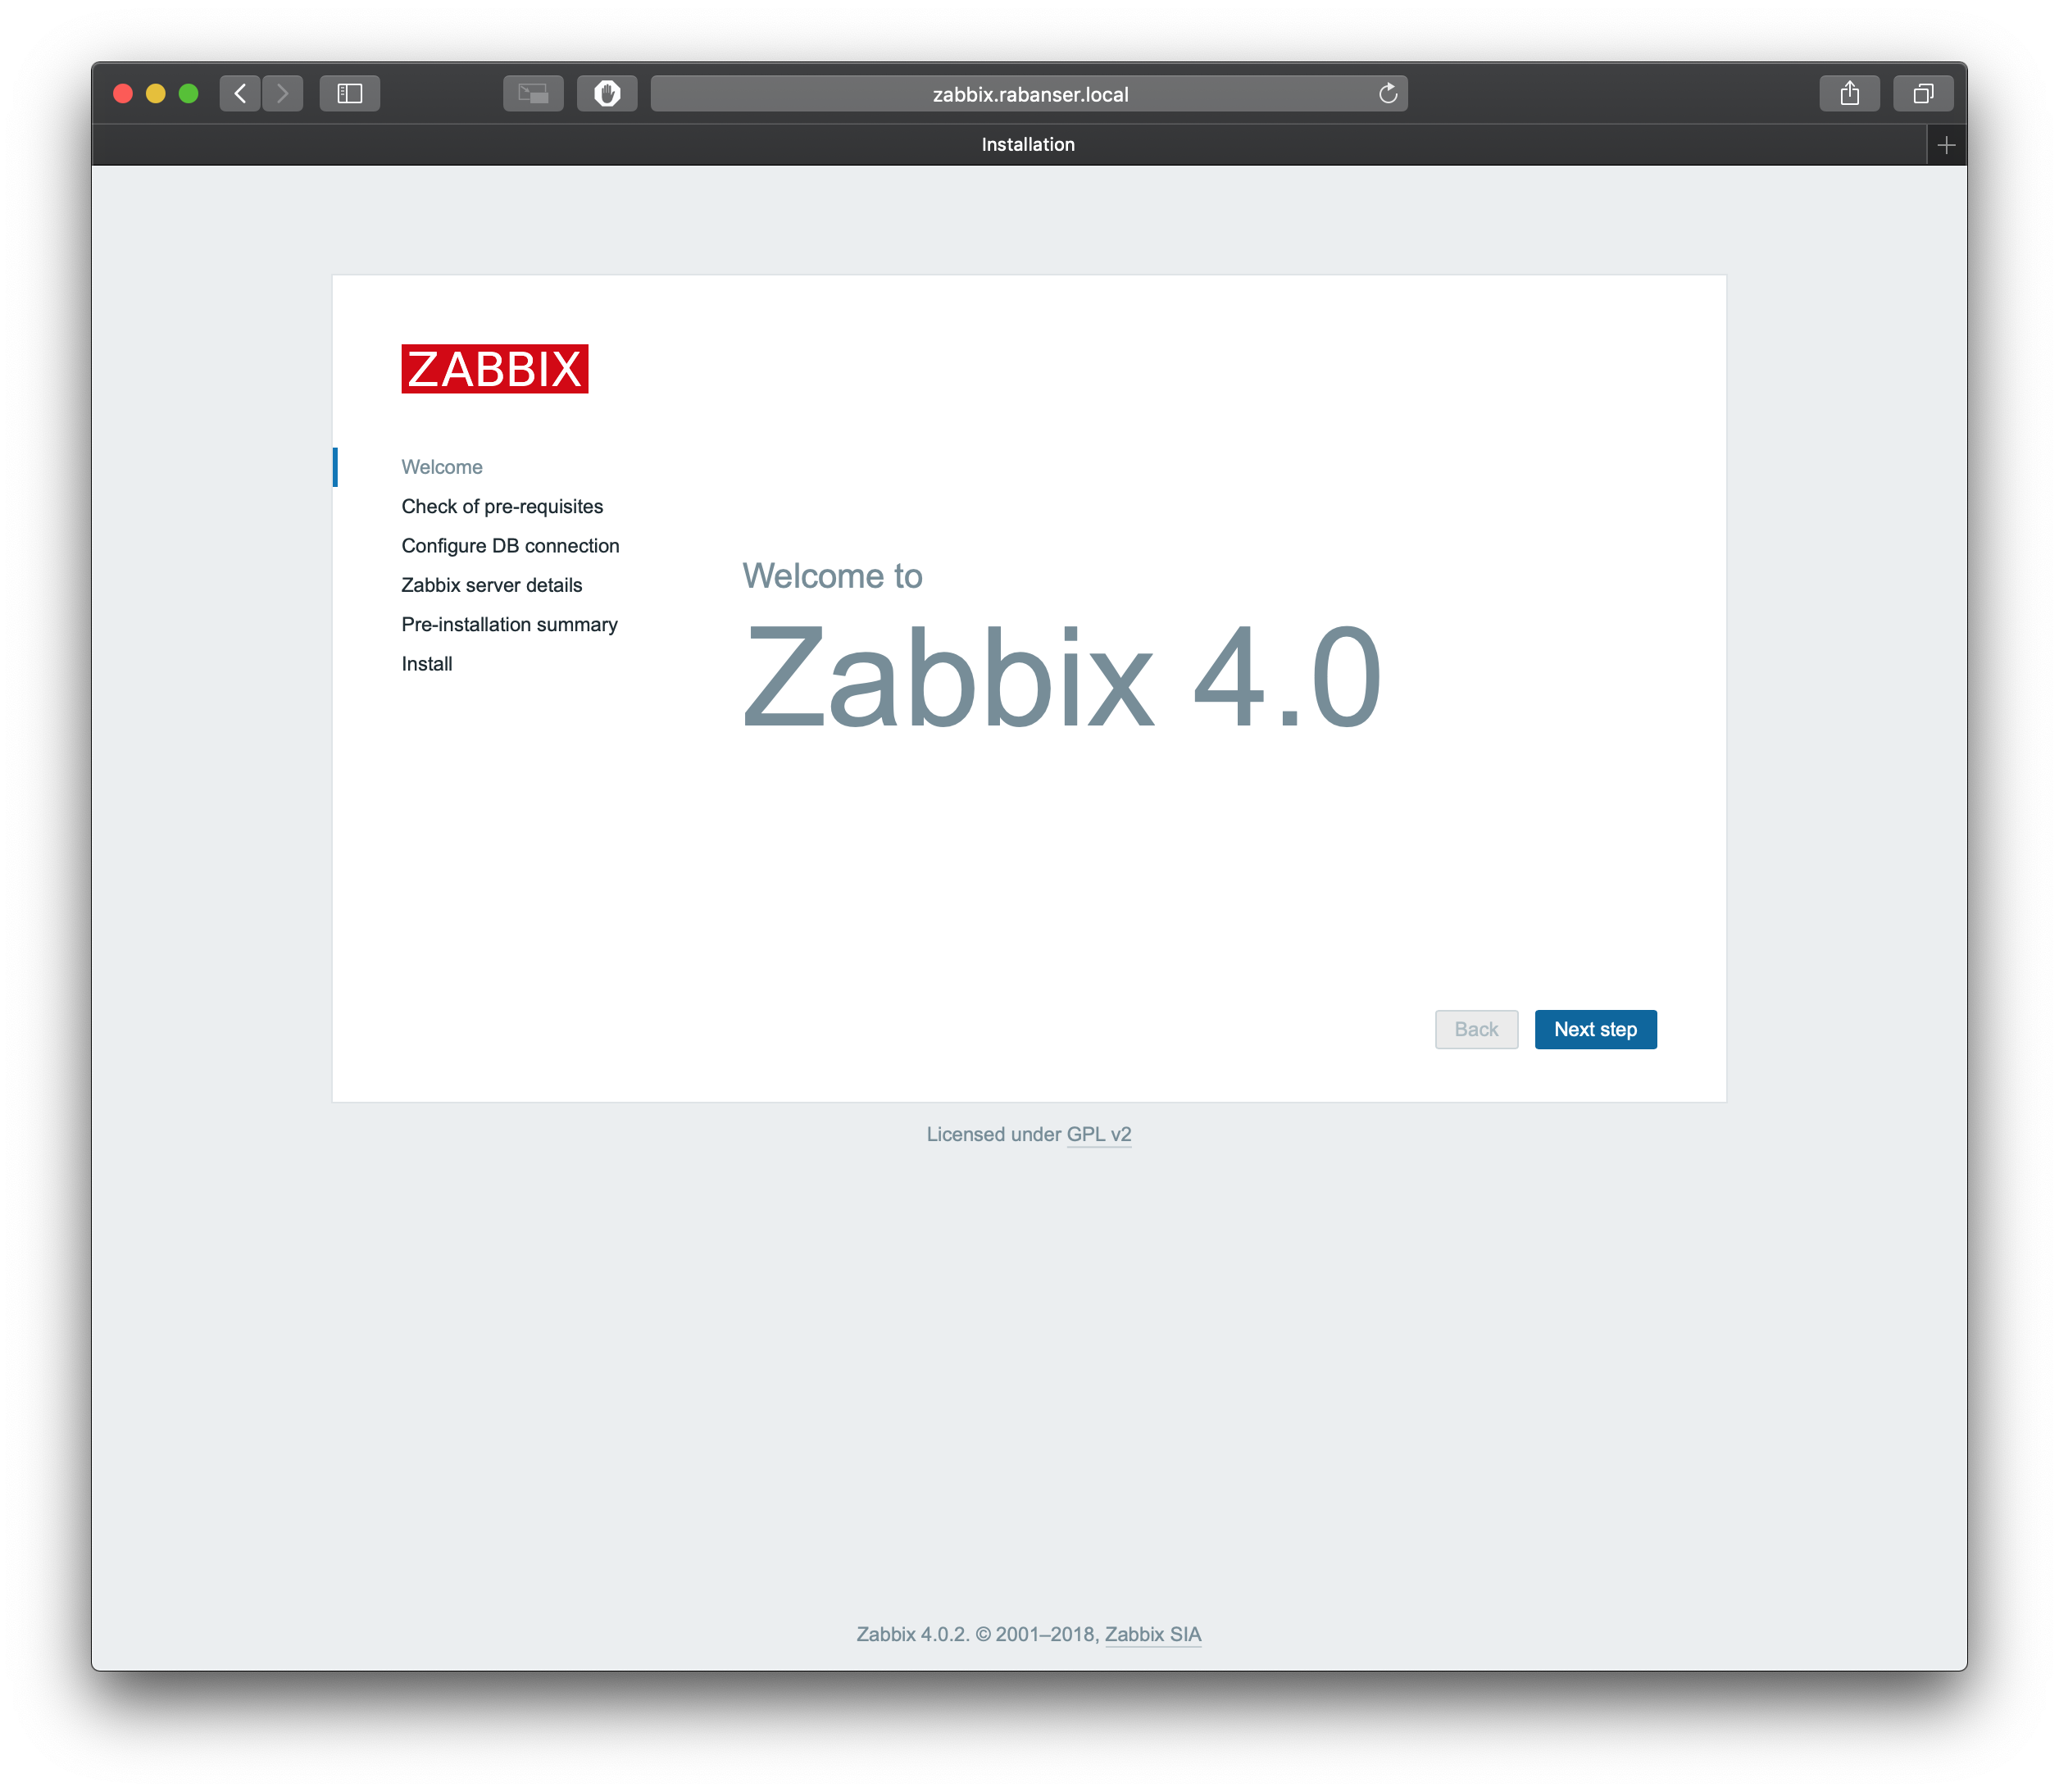
Start the installation
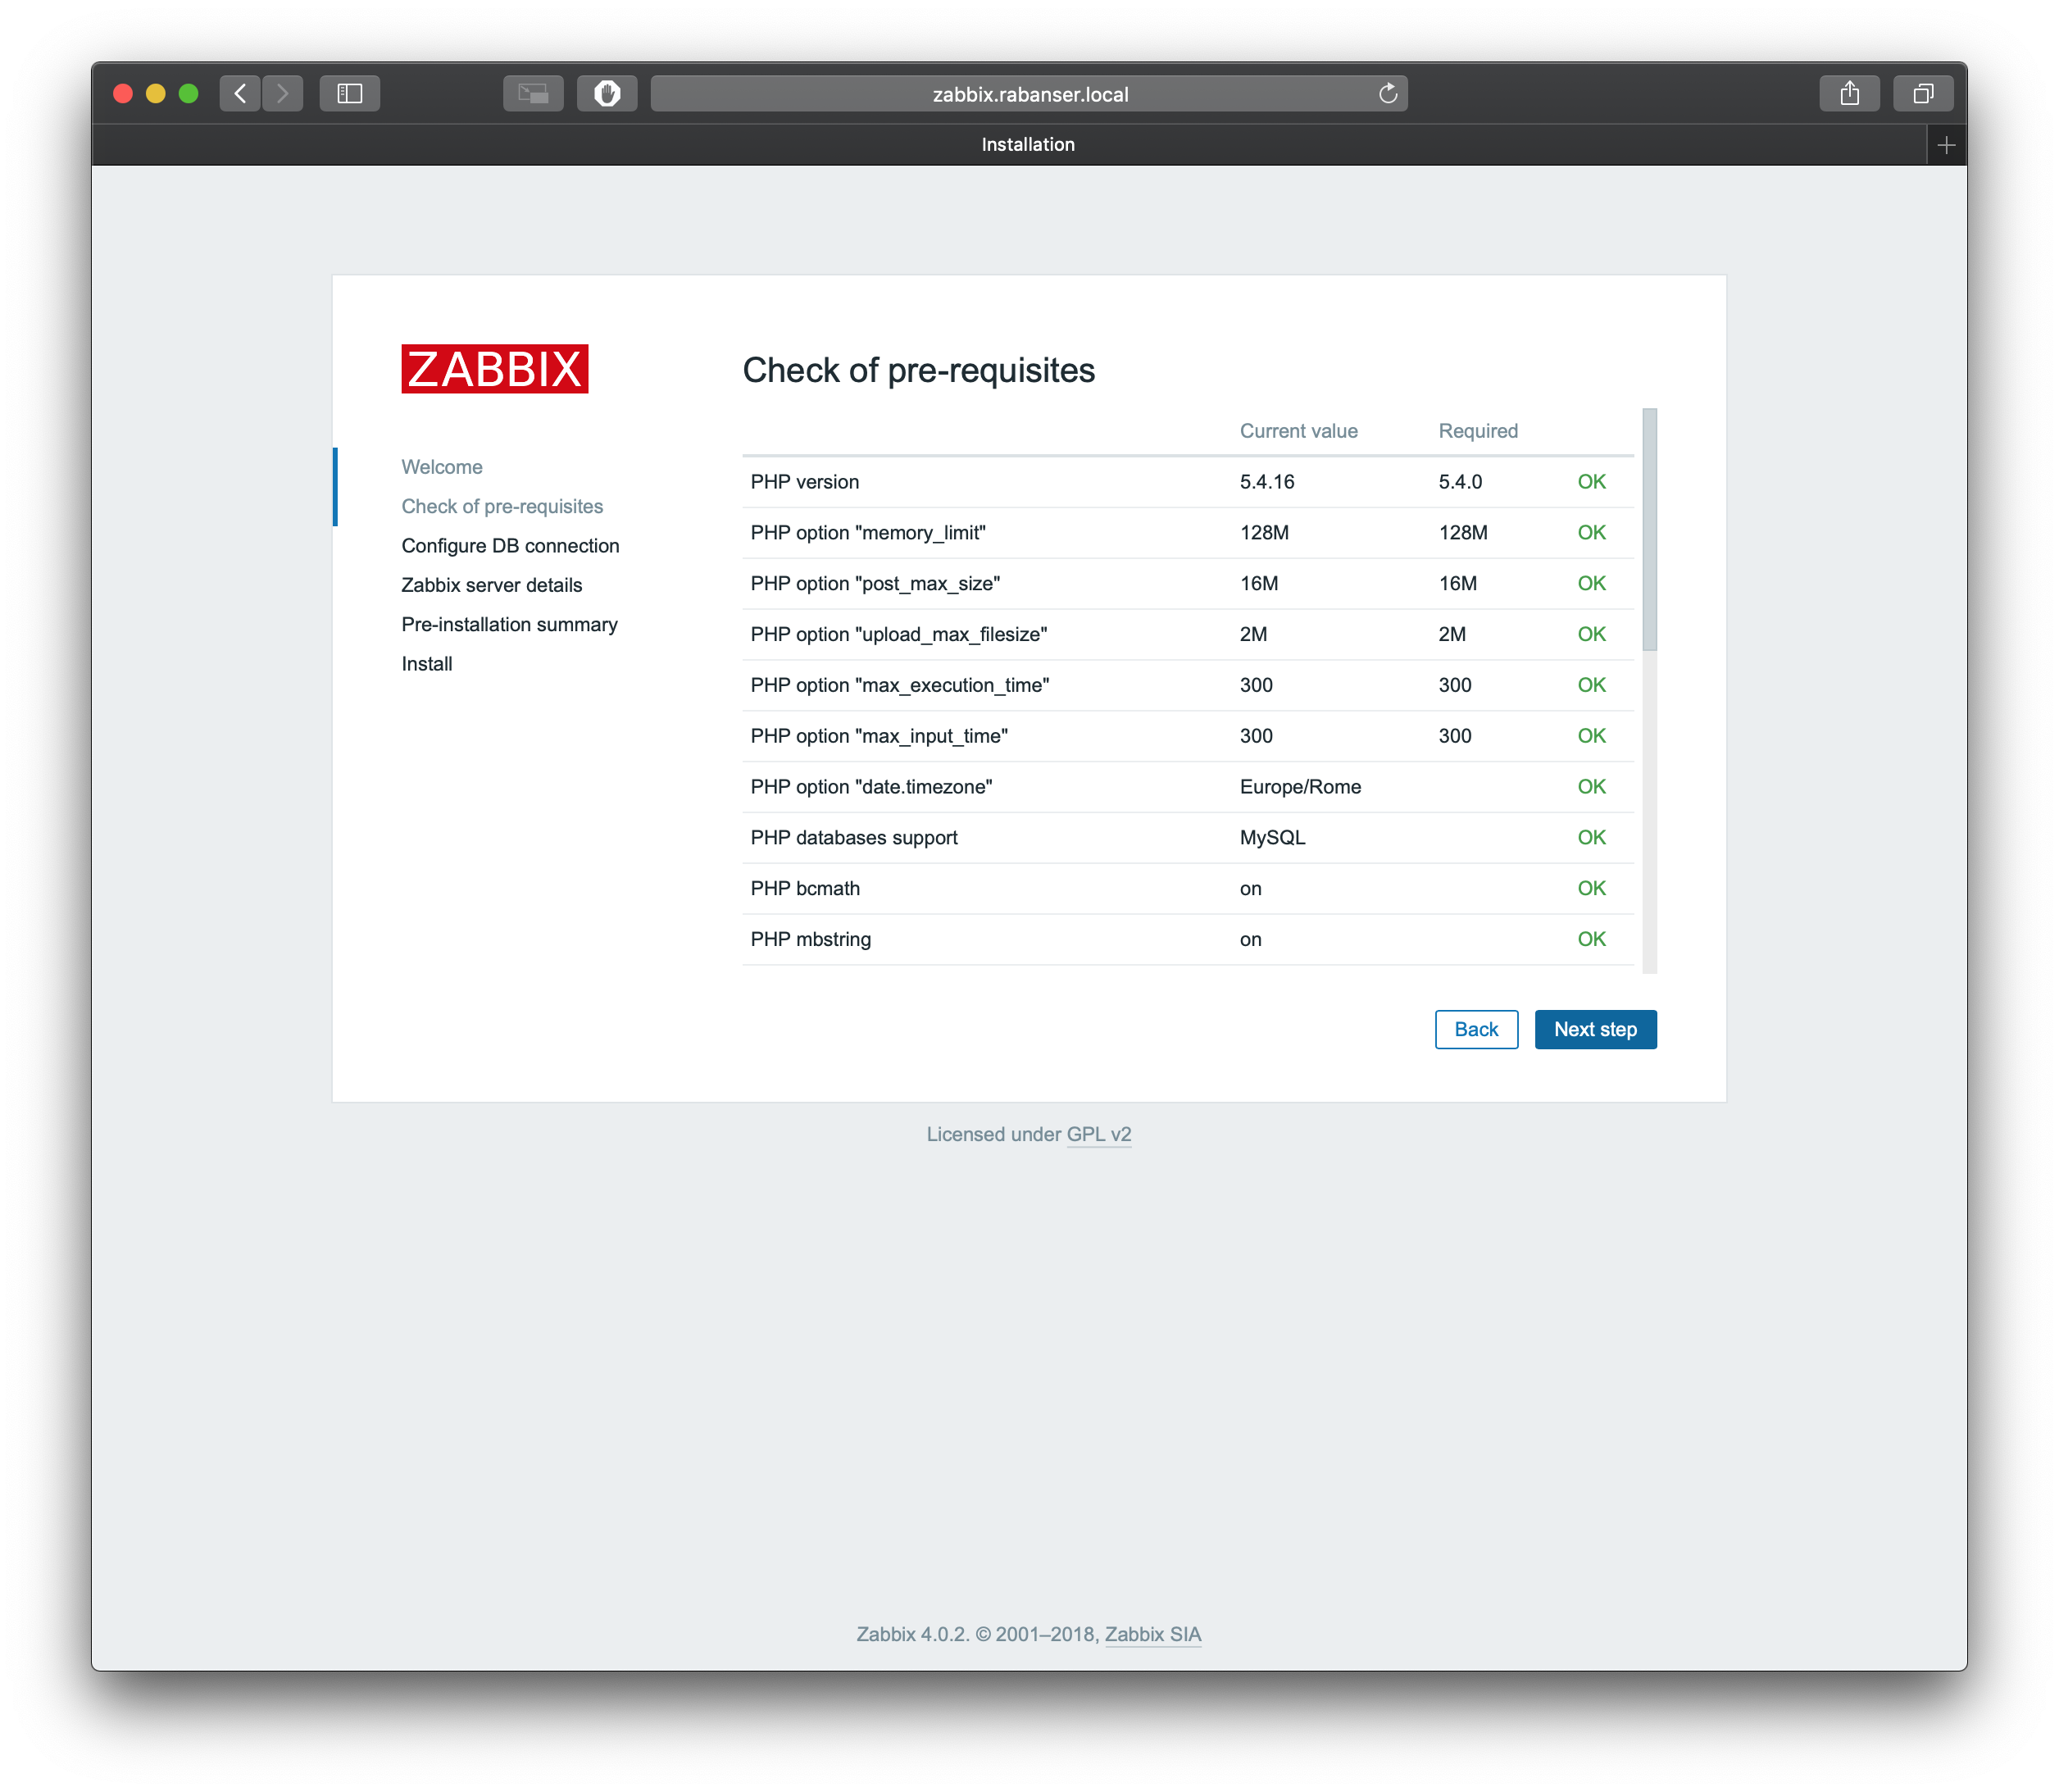
Verify the installation checks
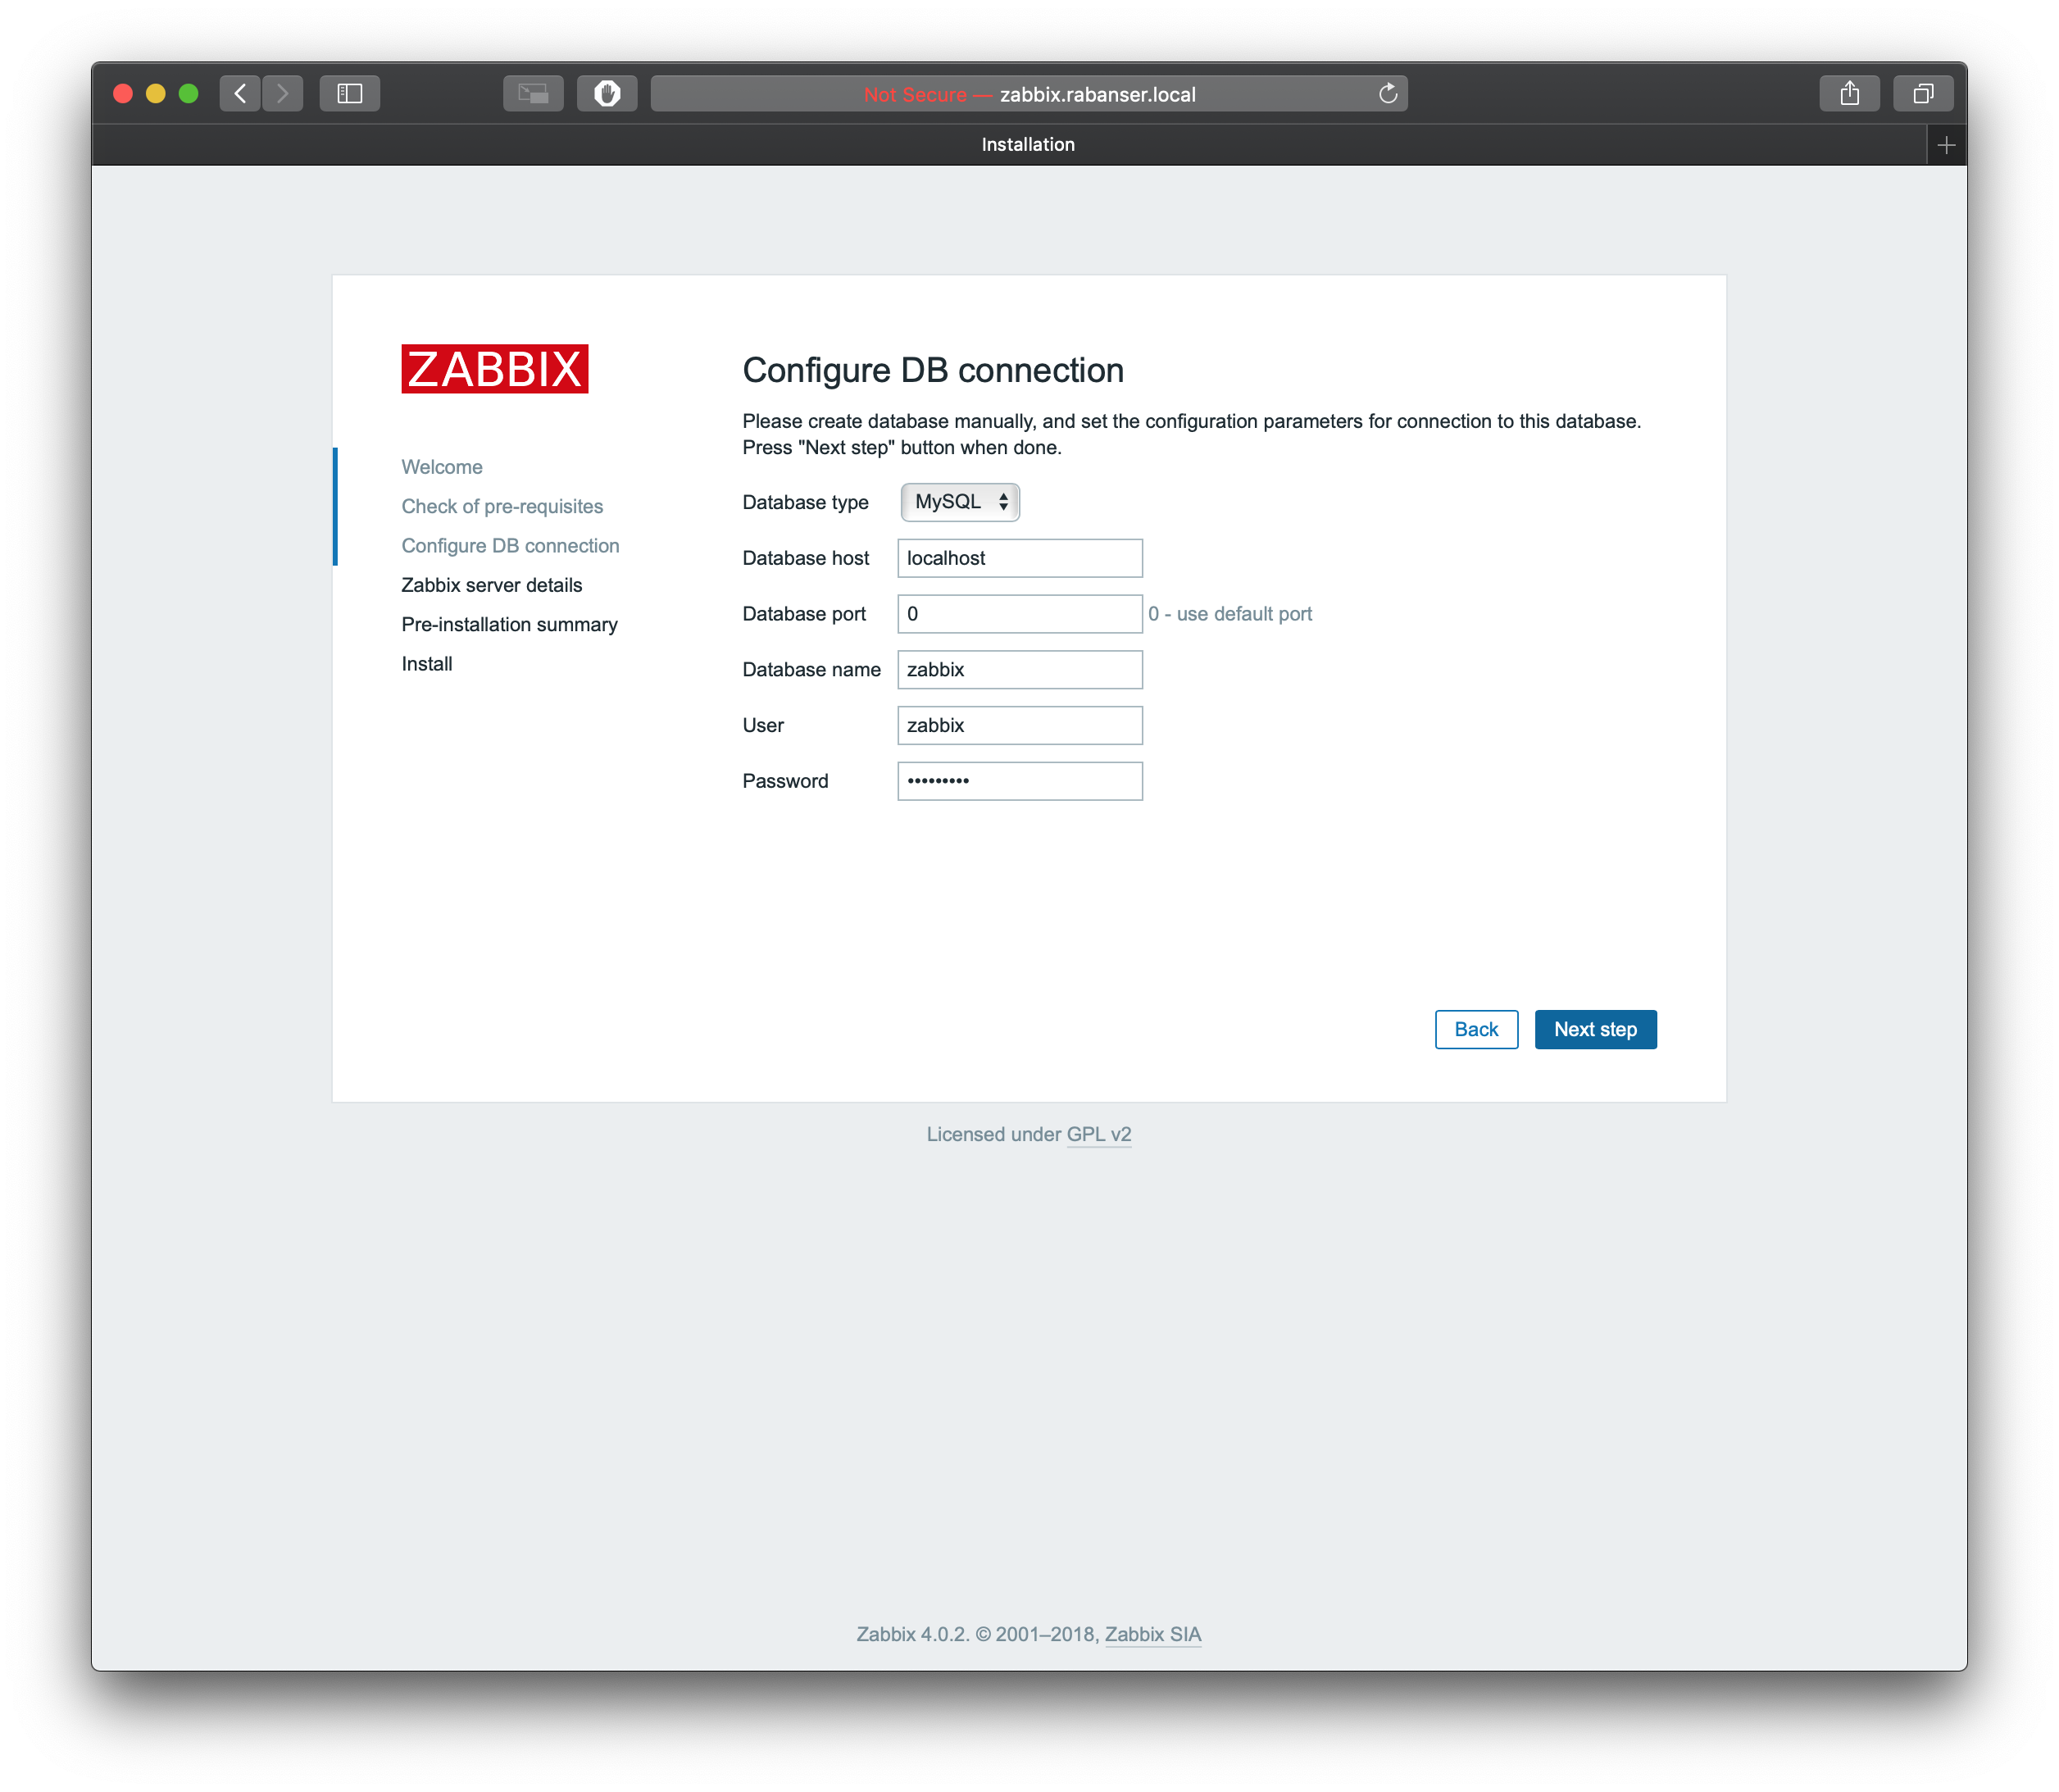
Database settings
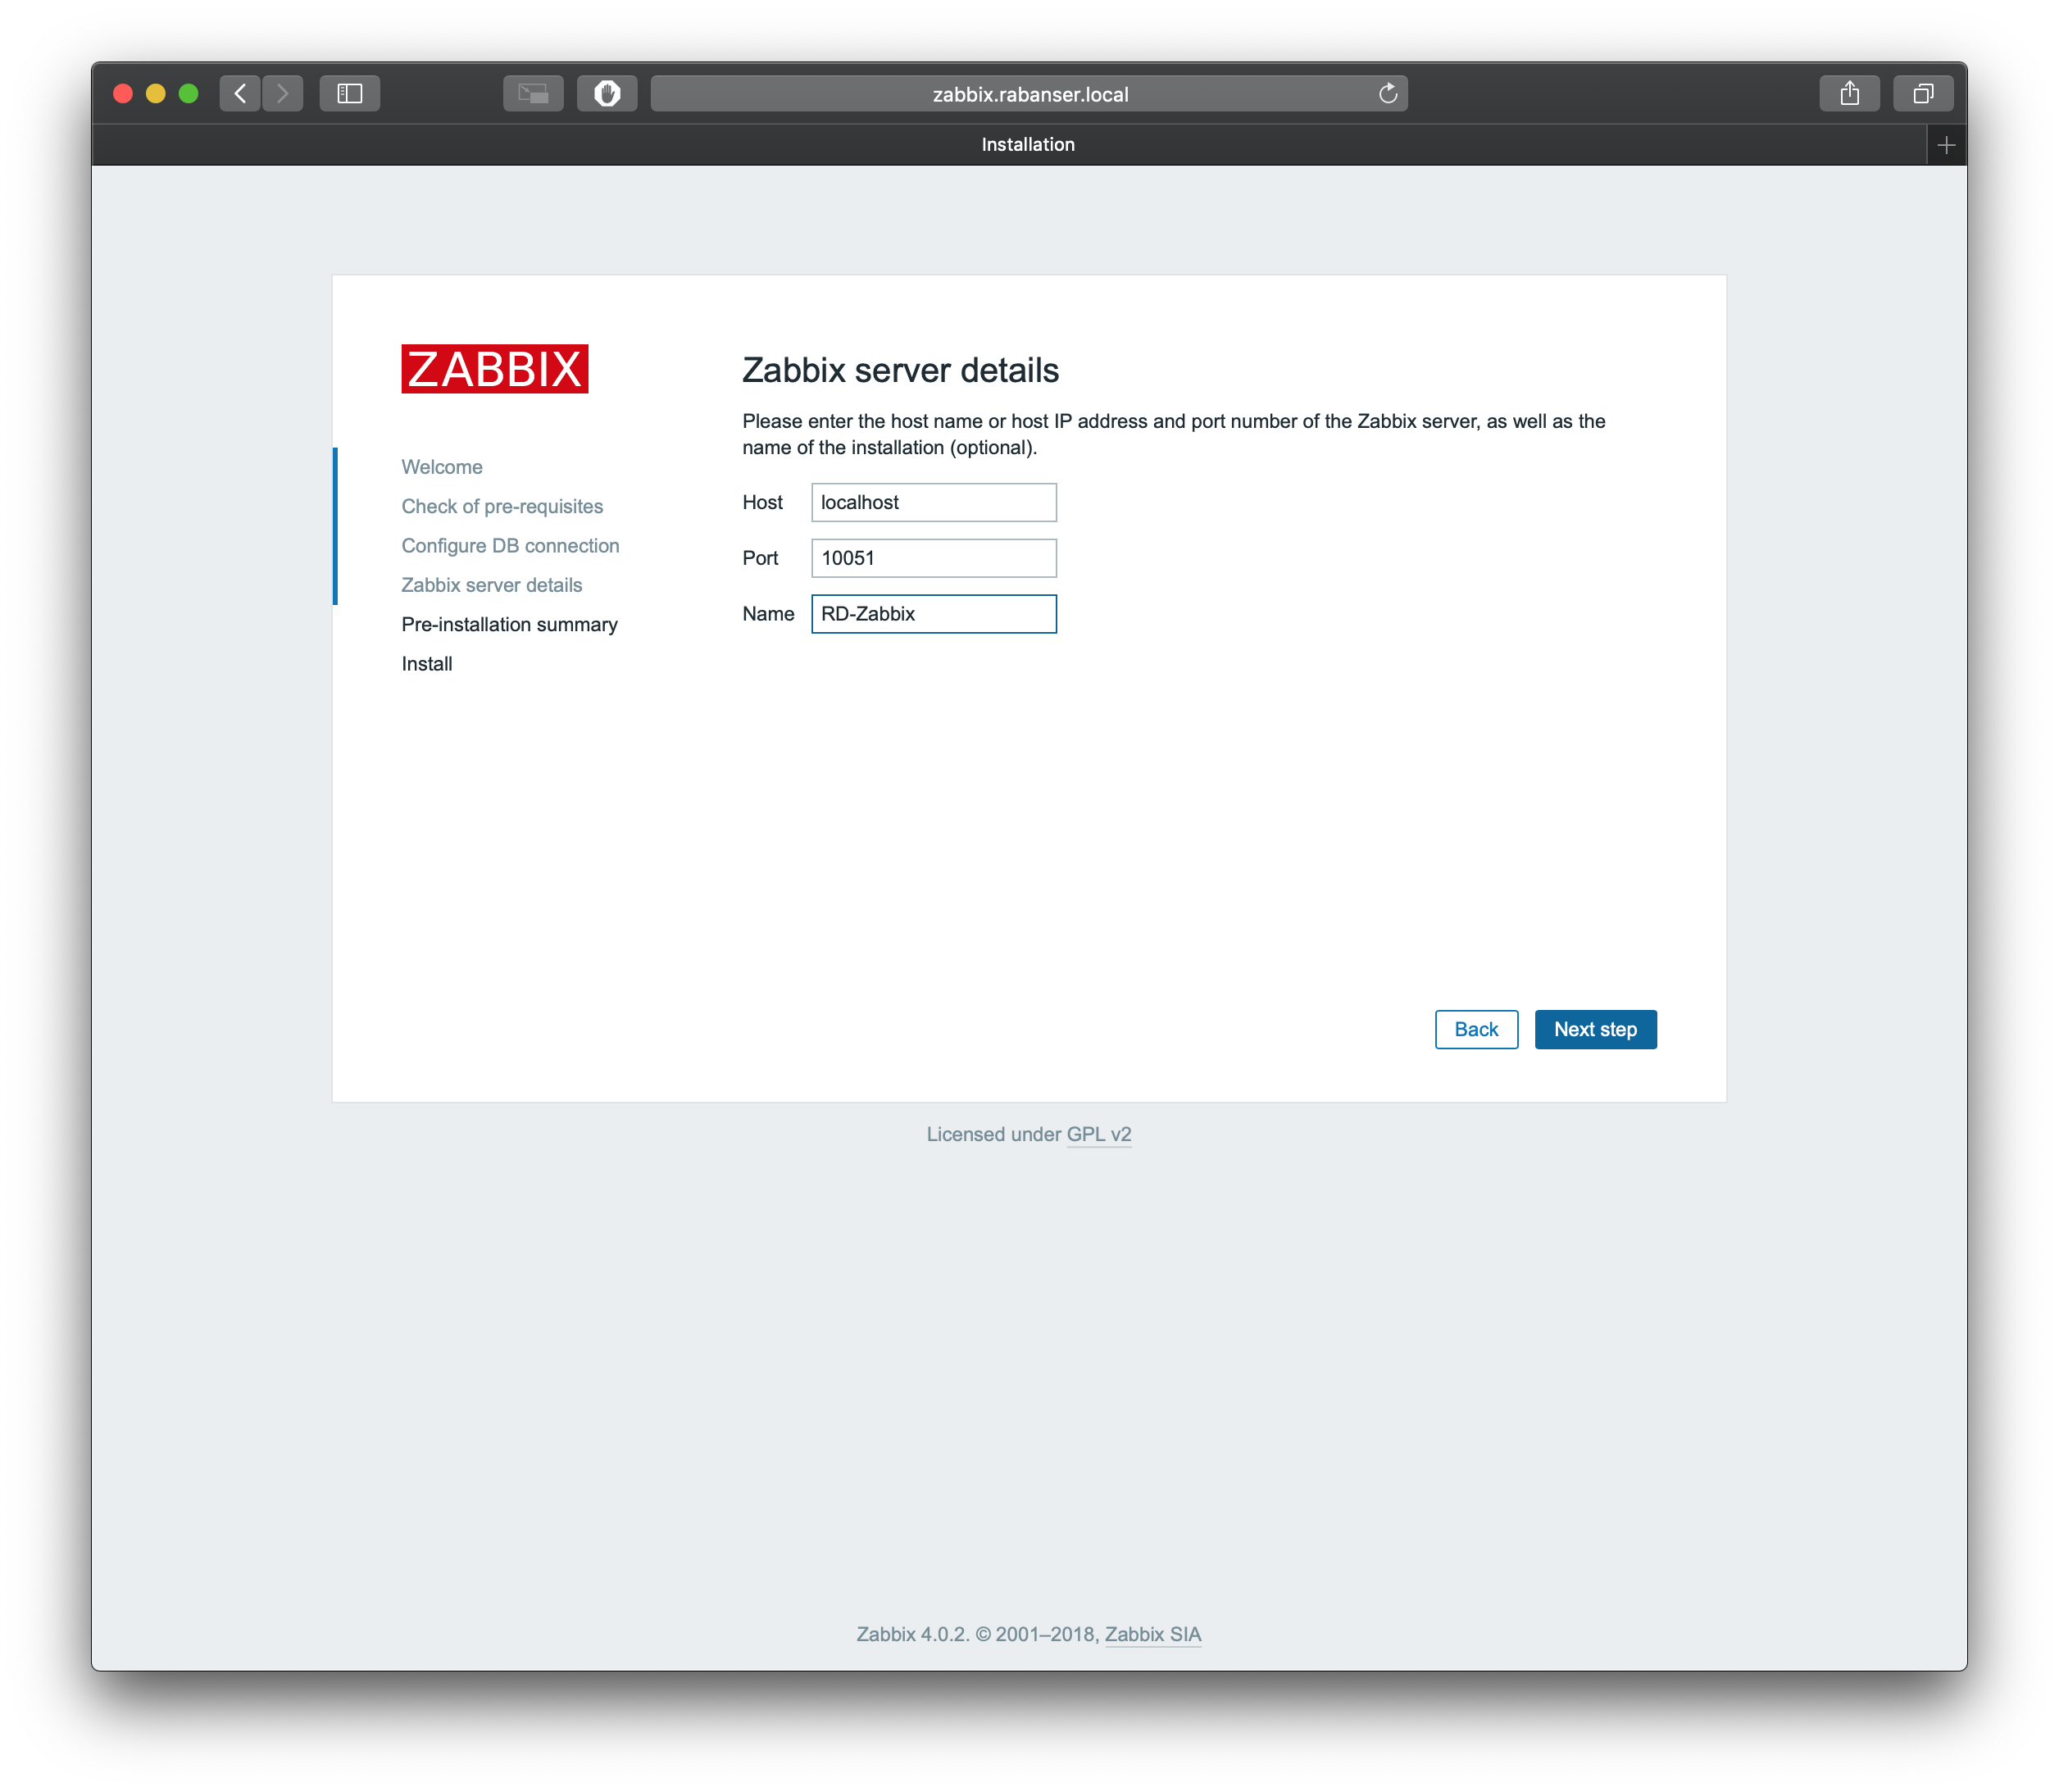
Server settings
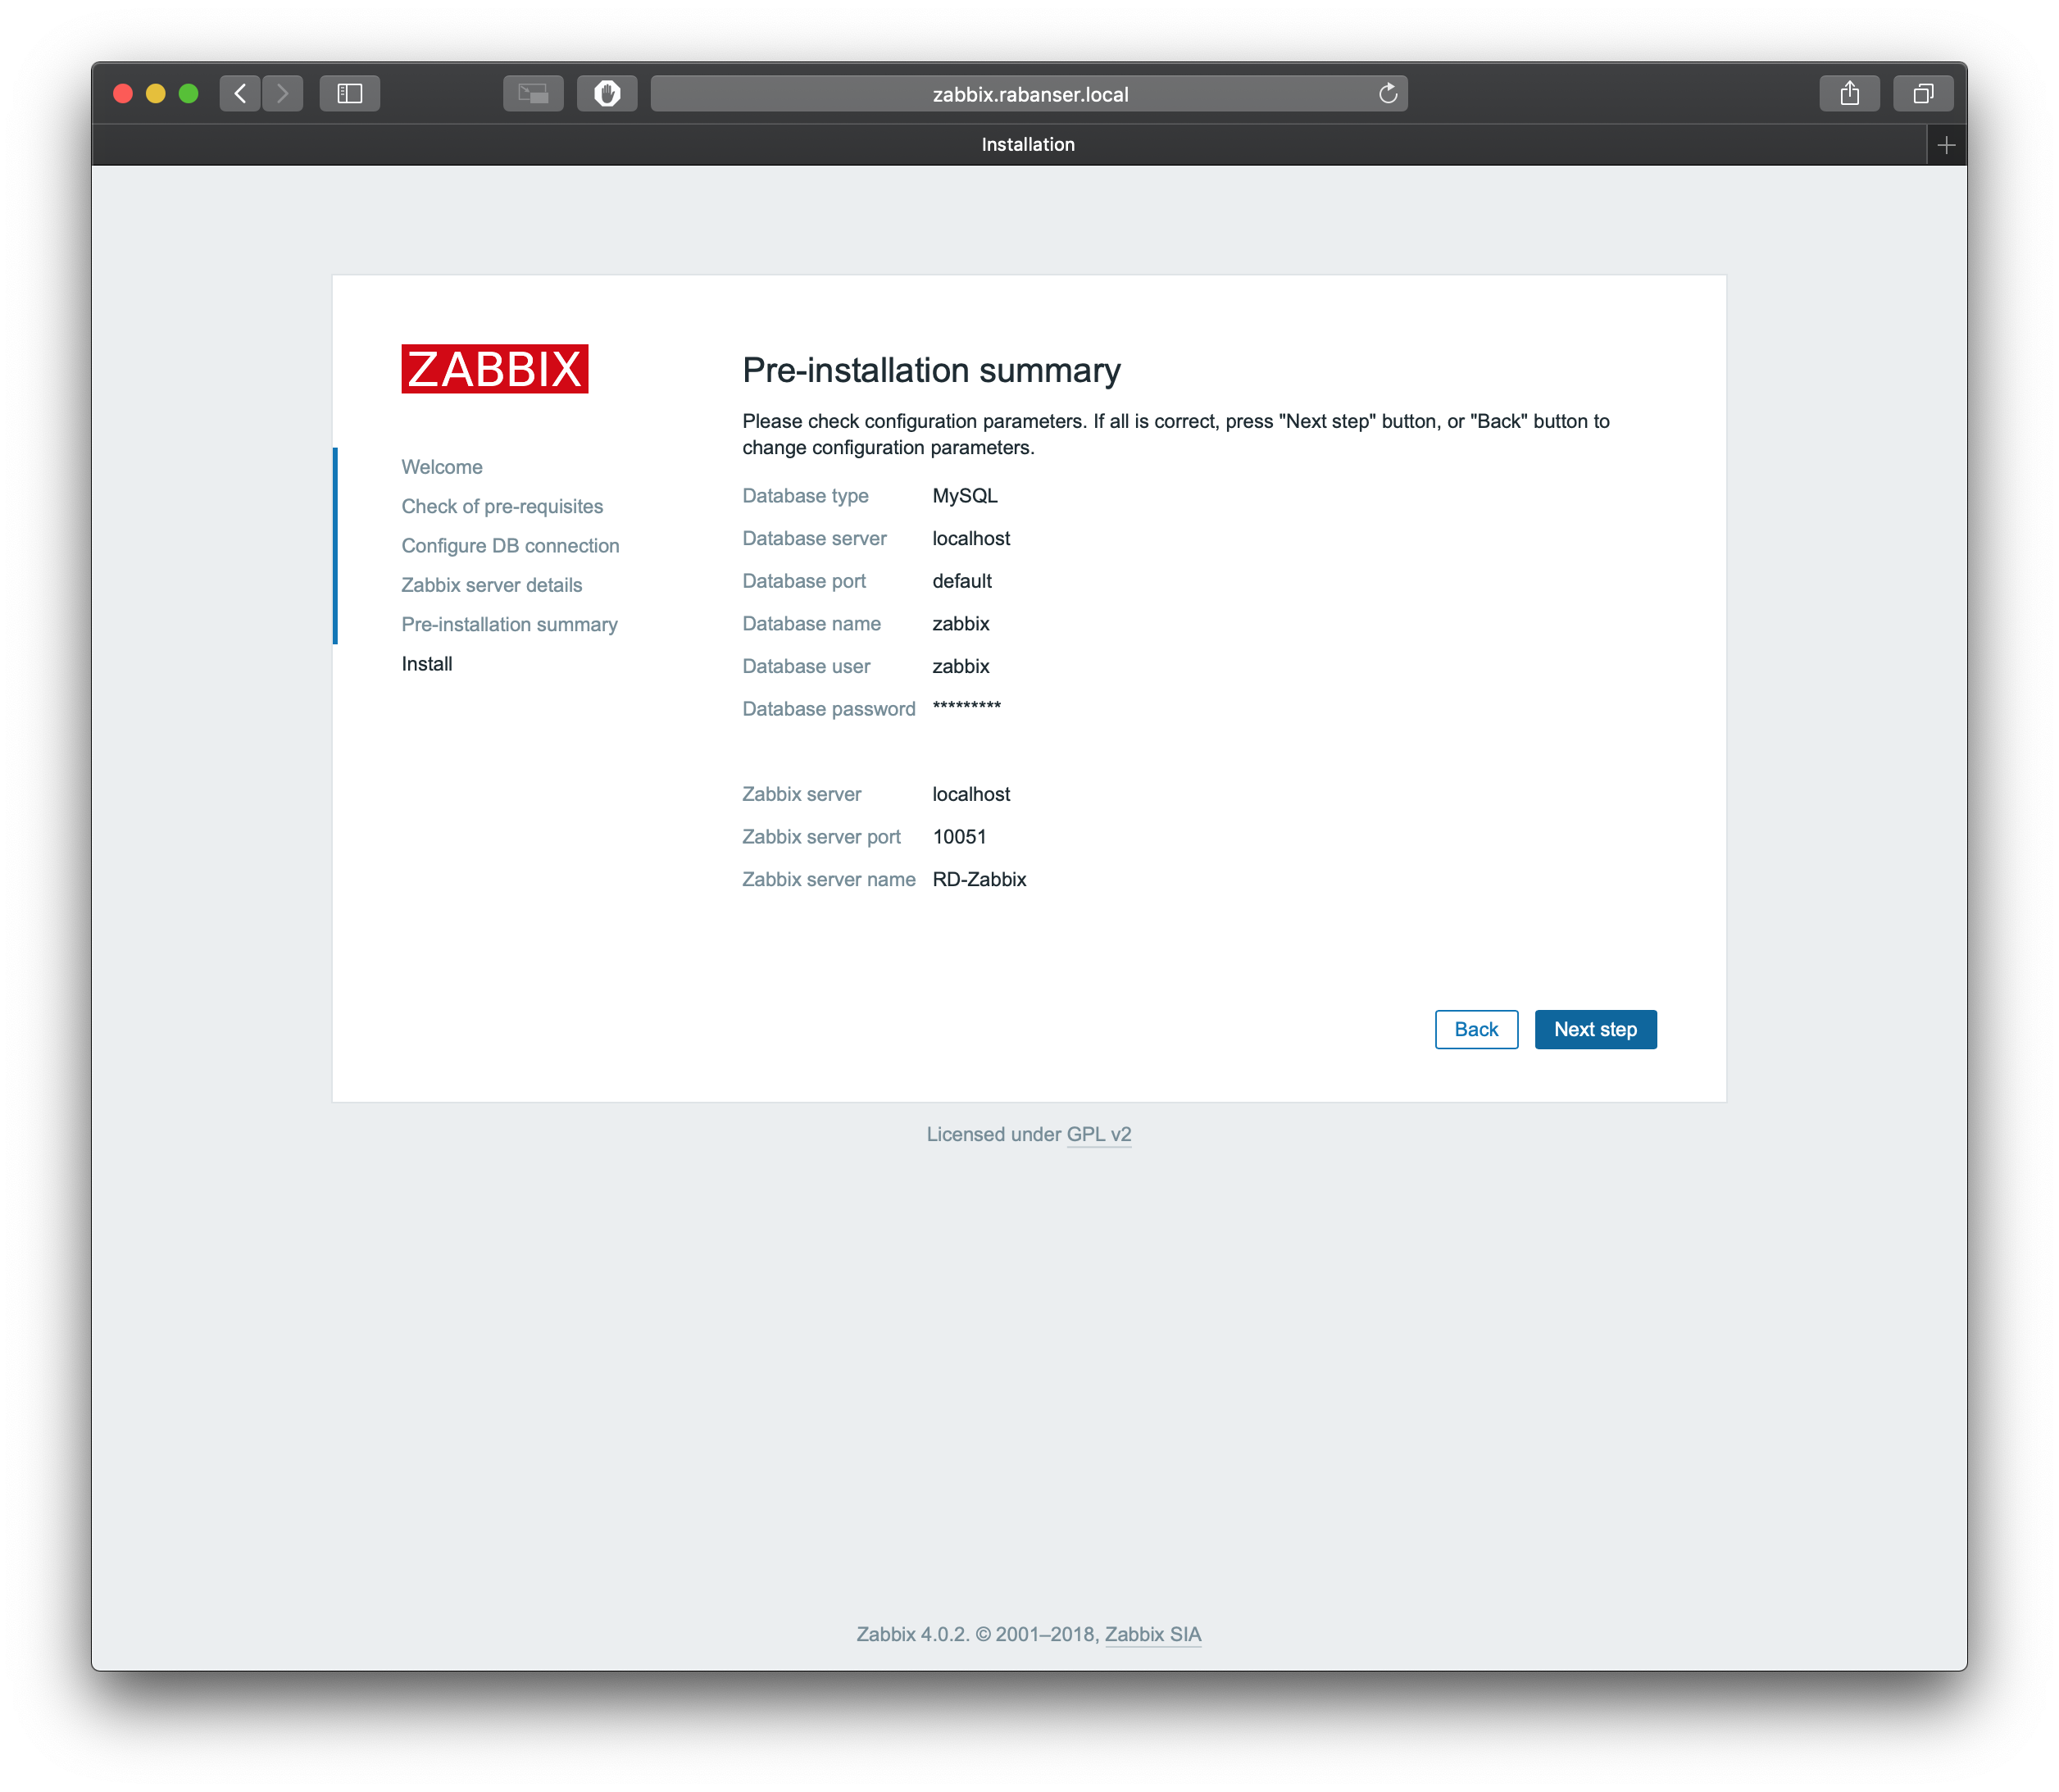
Verify the summary and start the installation
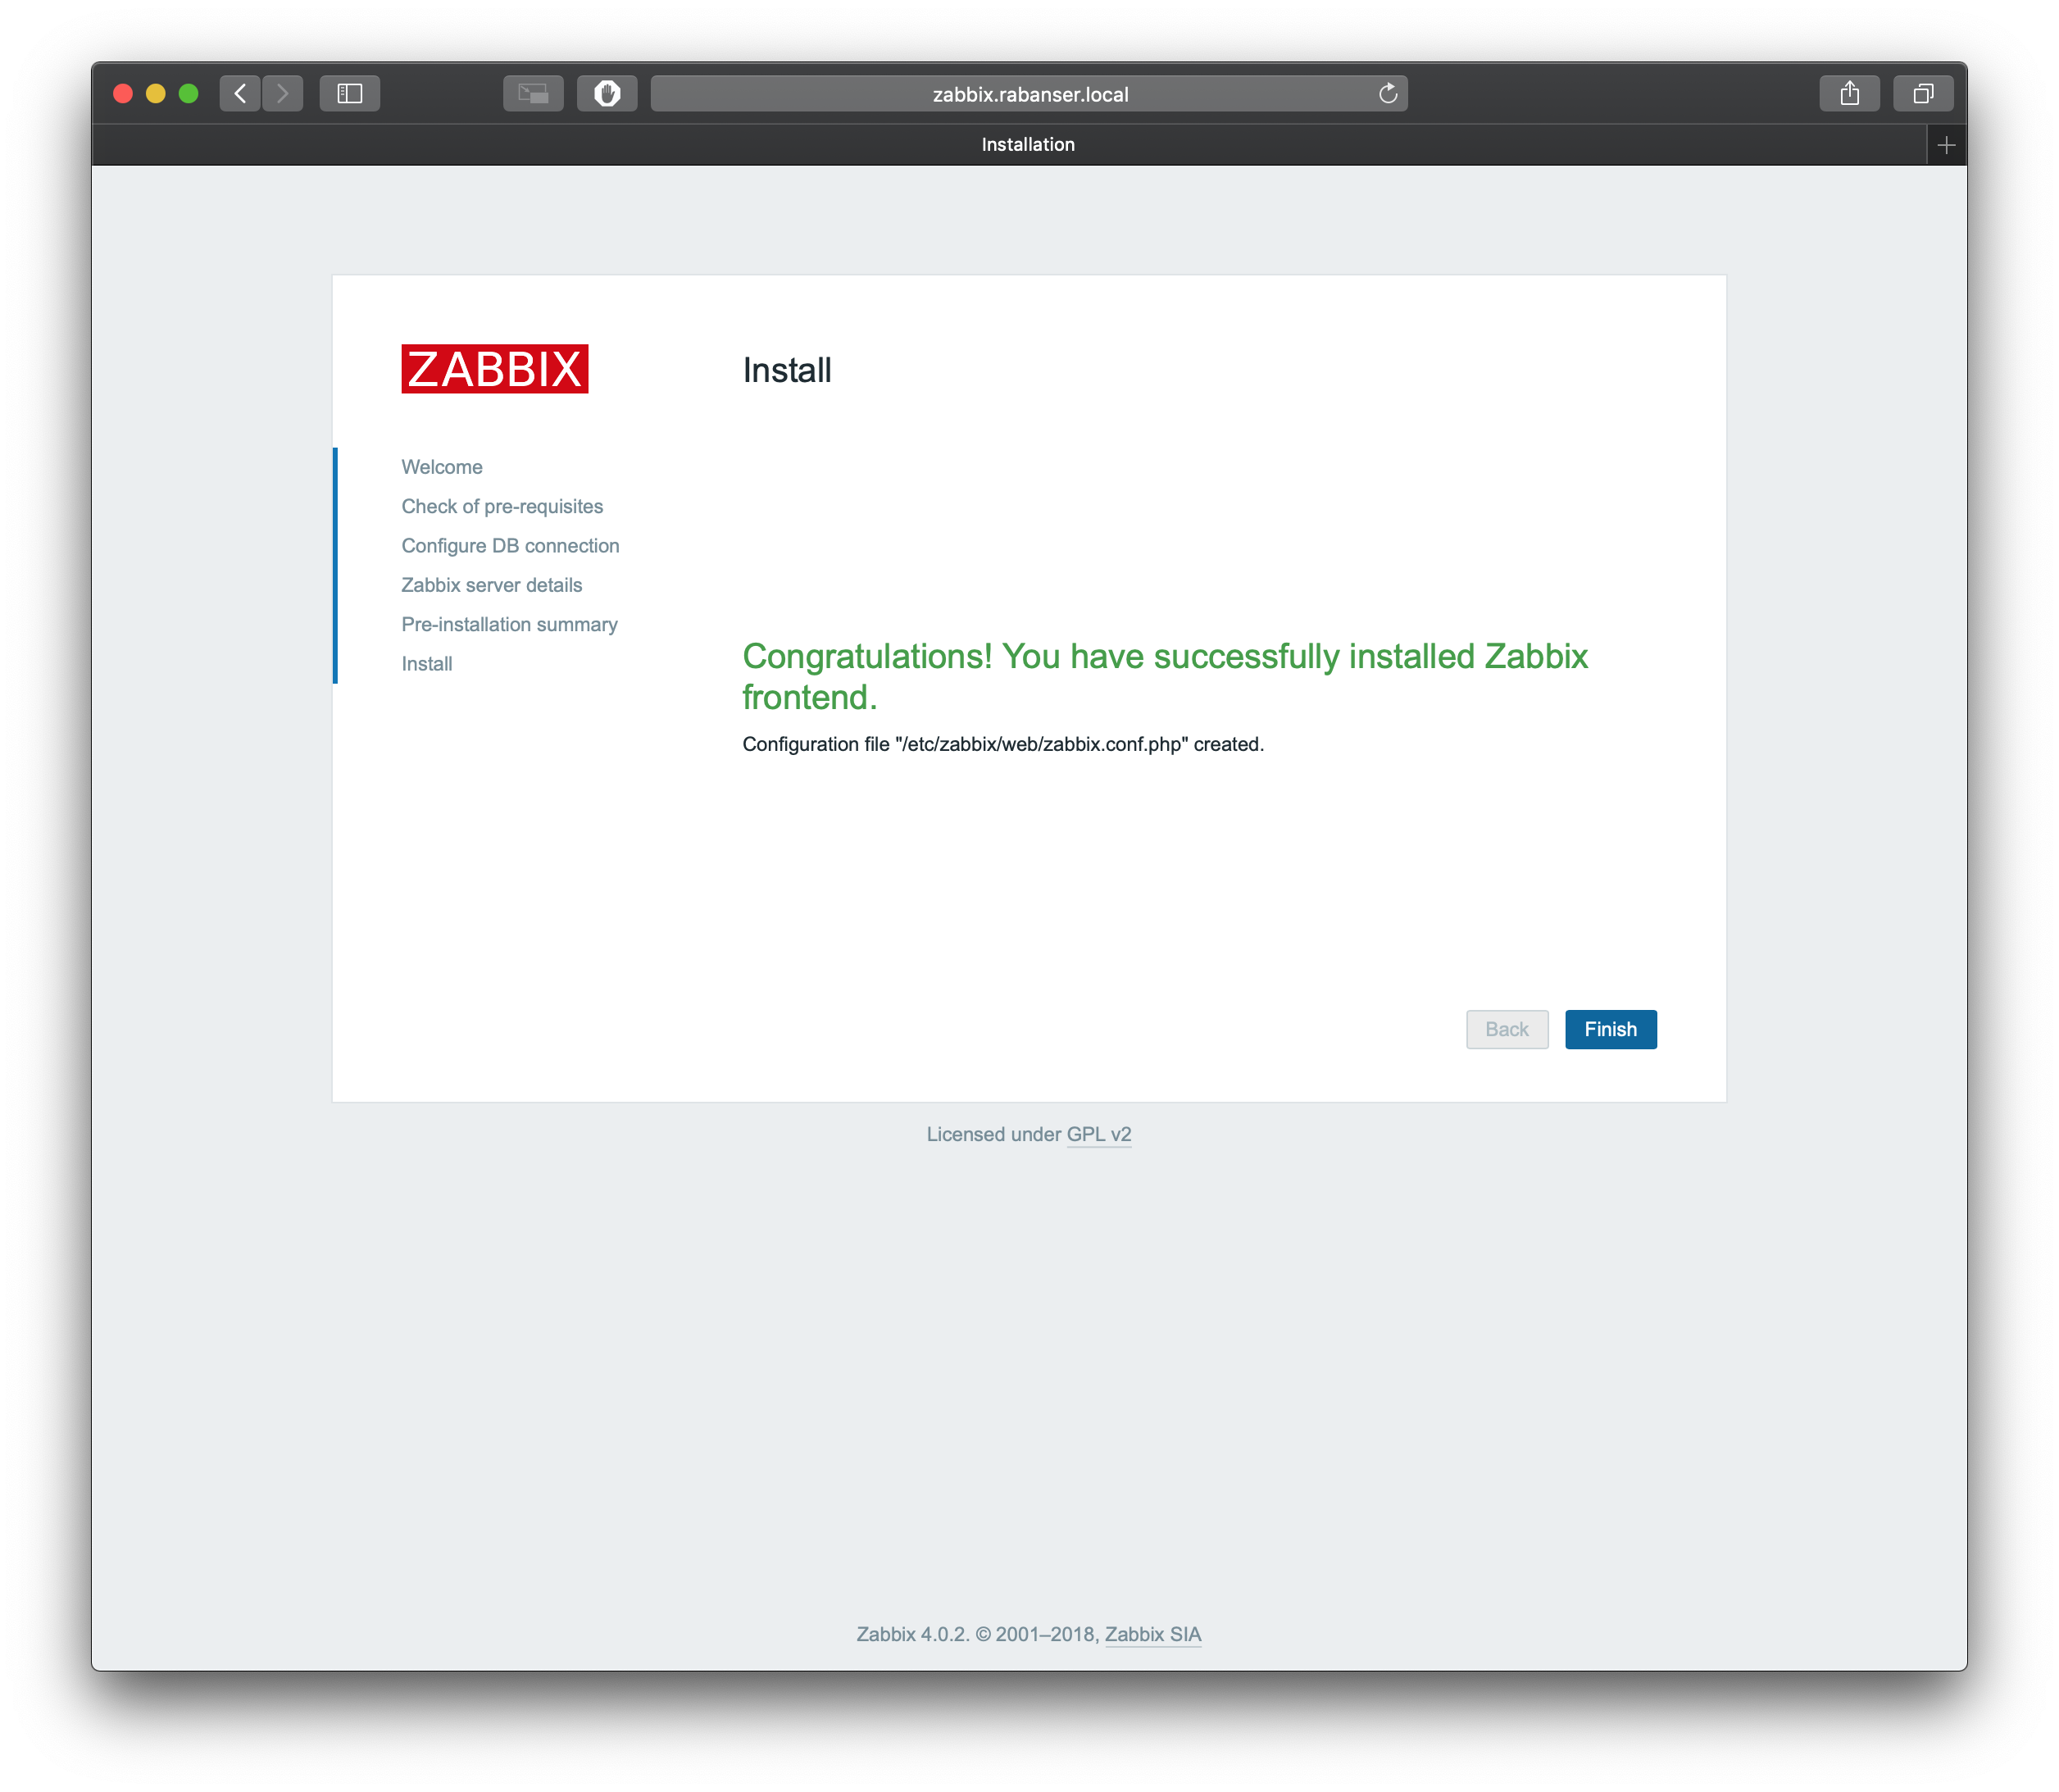
Installation succeeded
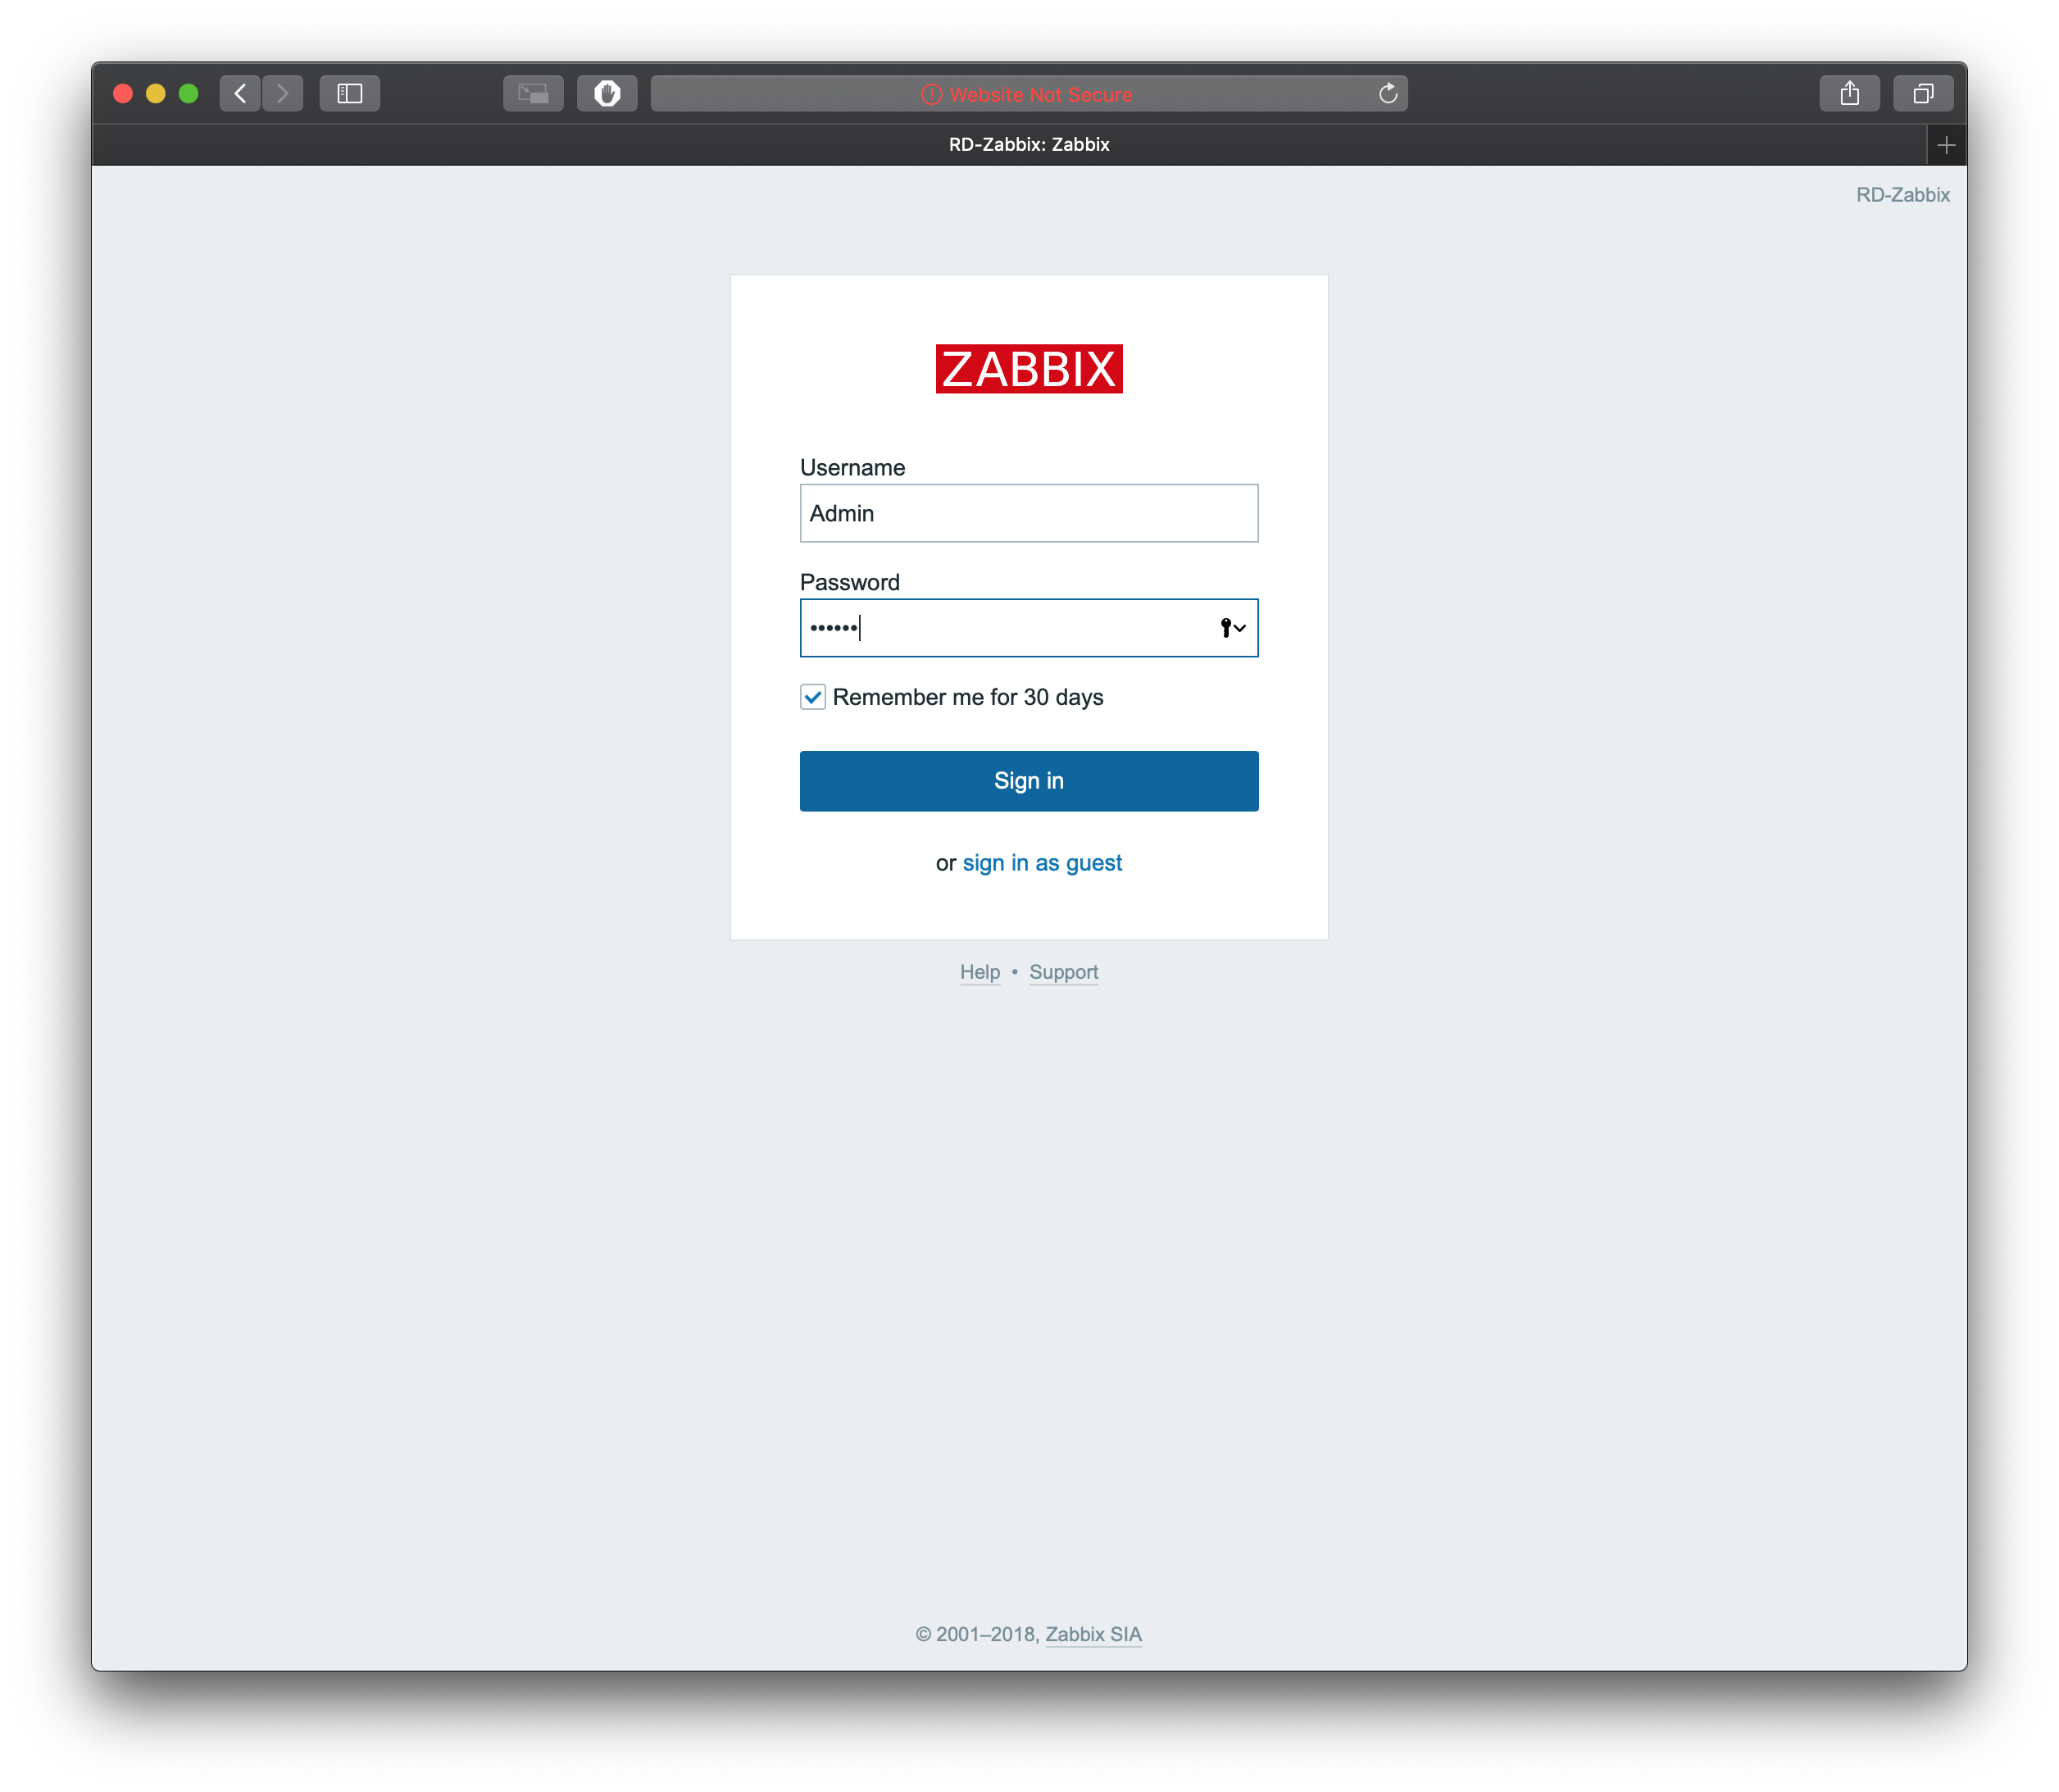
Login to your new installation, the defaults are: Admin / zabbix
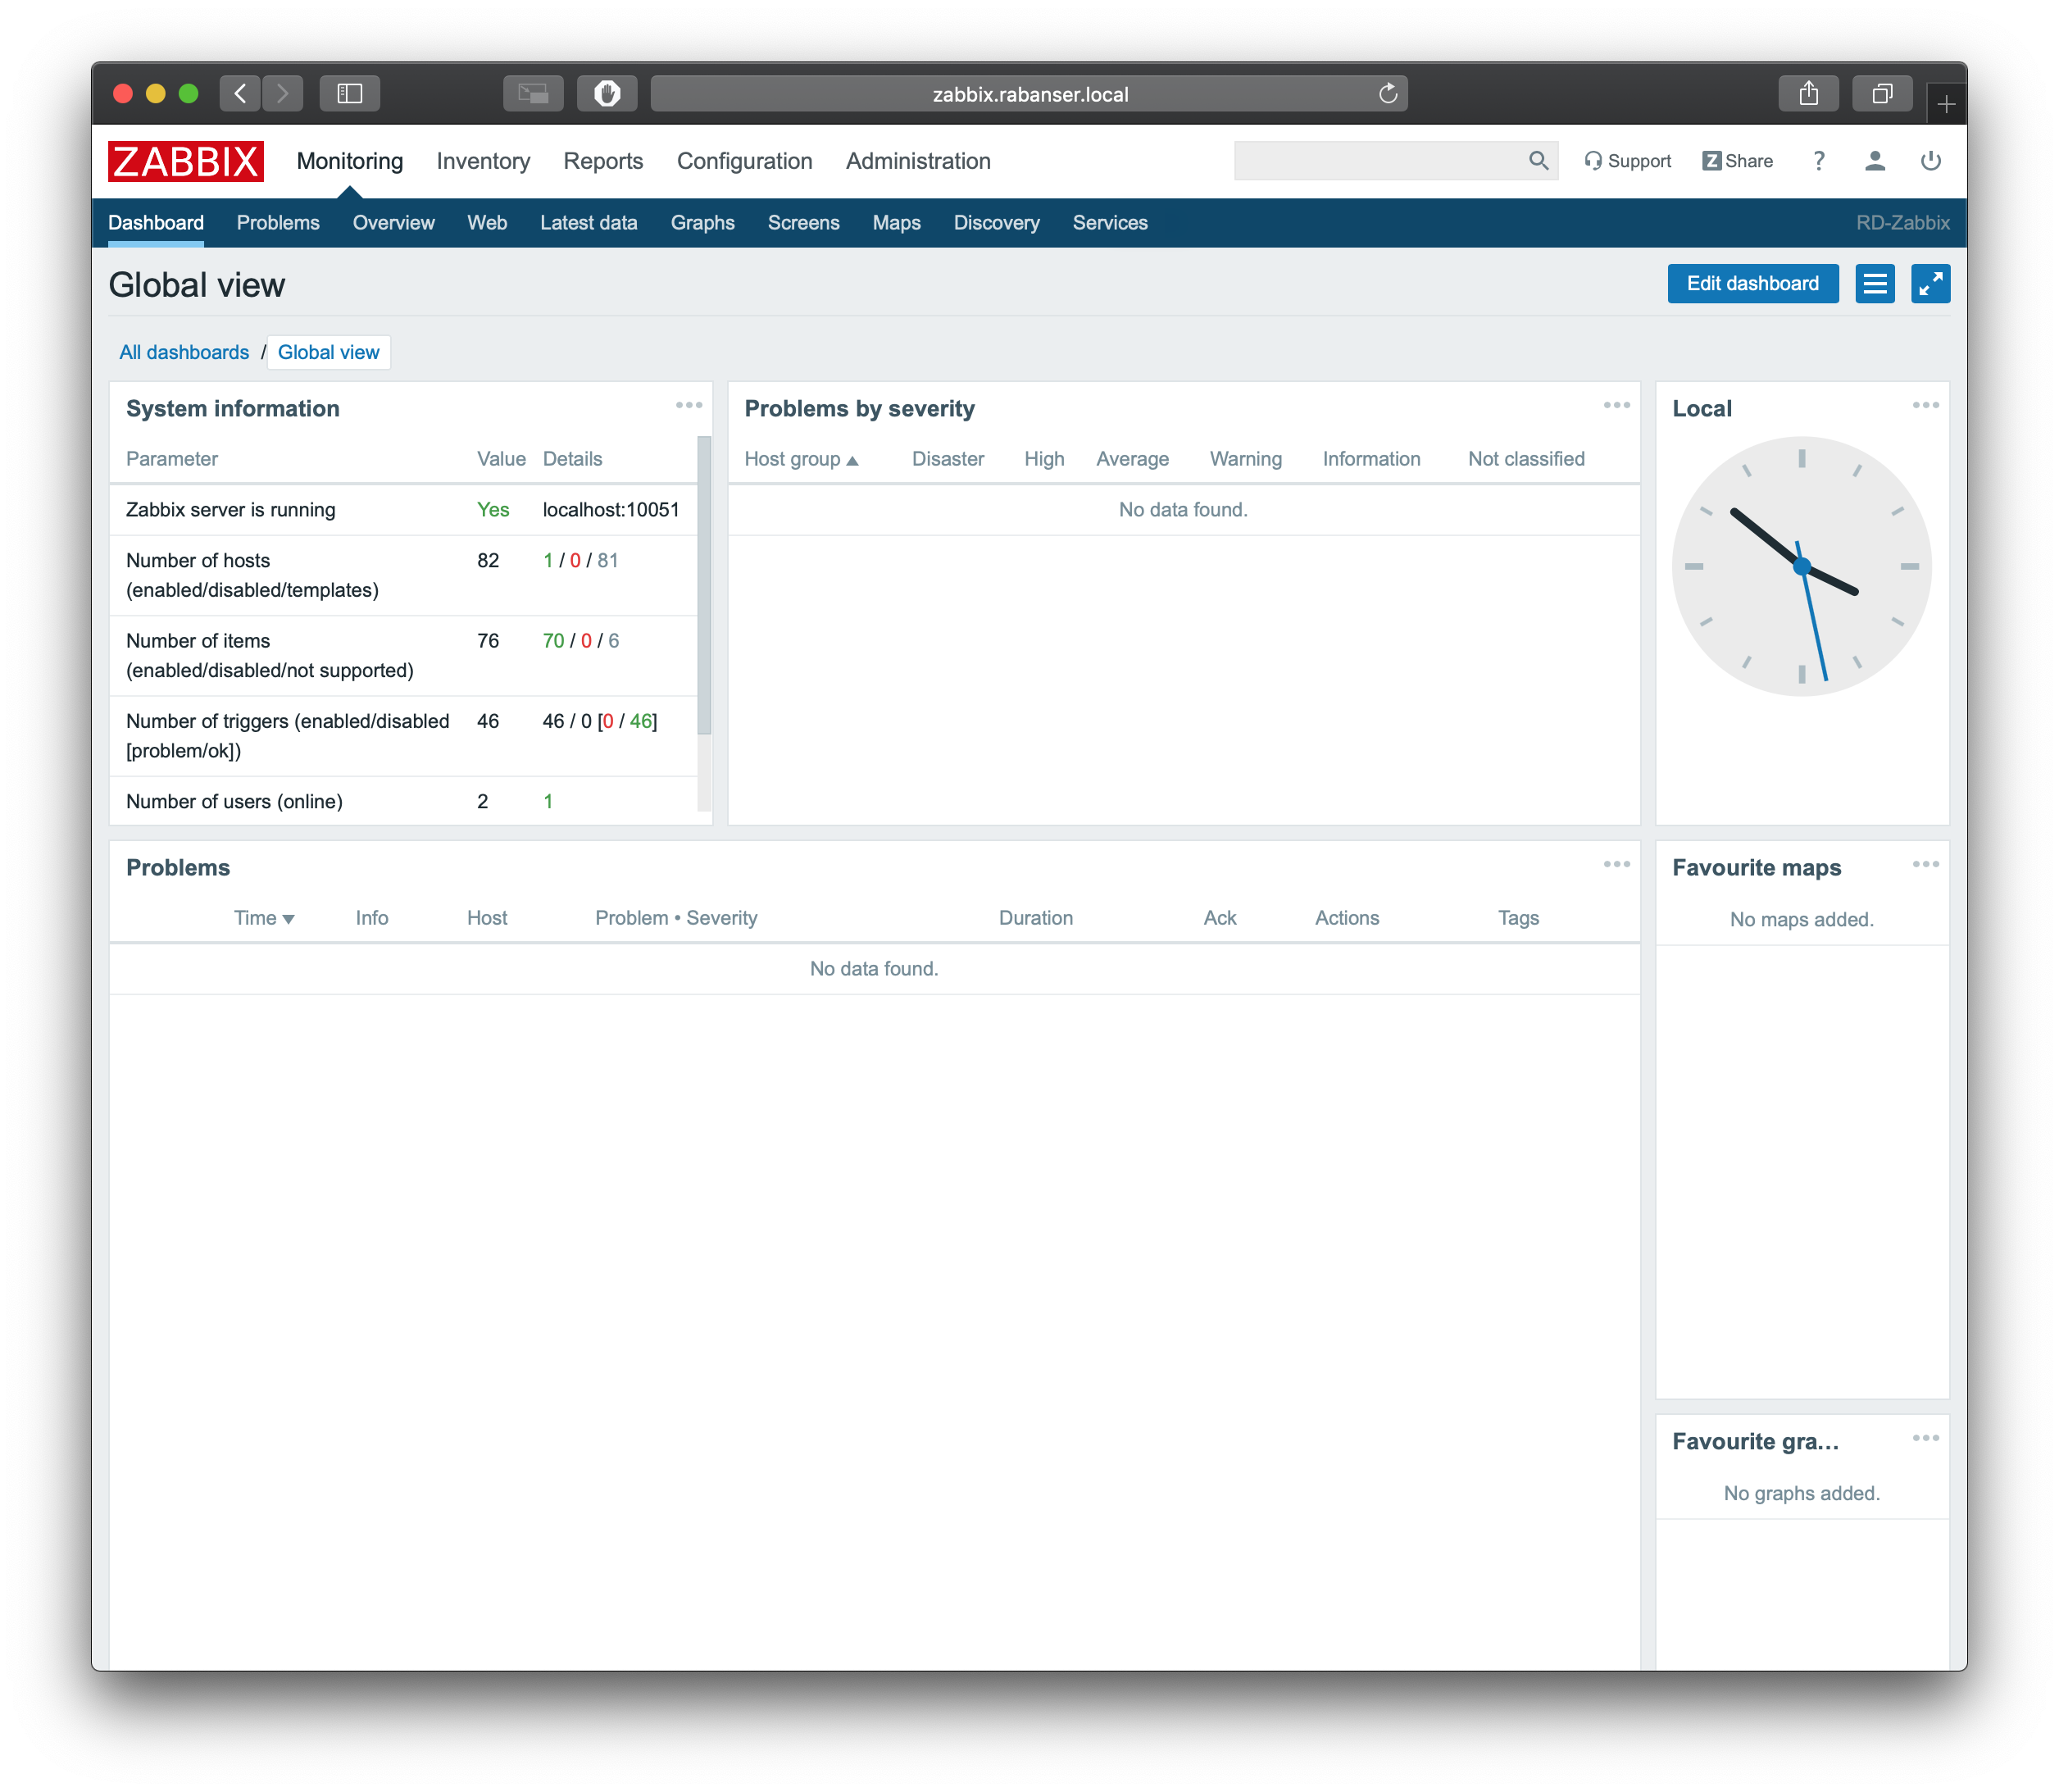
The Dashboard
Wrap up
Thats it, that’s all there is to it. For now at least. I’m going to publish a few more articles about Initial configuration & Windows monitoring.
Stay tuned for that.